How to make a lariat with tassels
This is an illustrated step-by-step guide to making the lariat necklace shown below. It documents my own trial-and-error process, developed over the last few years.
I don't plan my lariats in advance except for choosing the beads I will use.
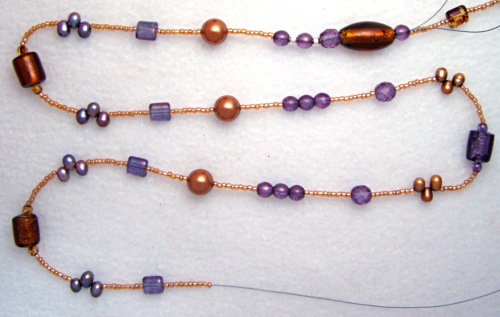
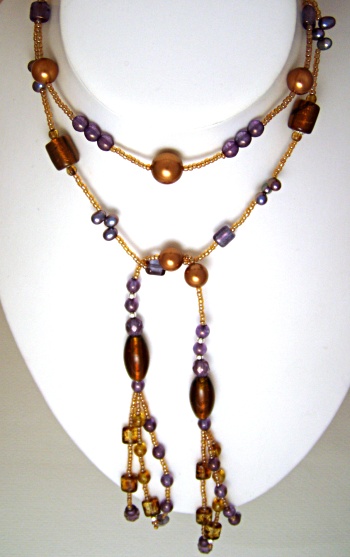
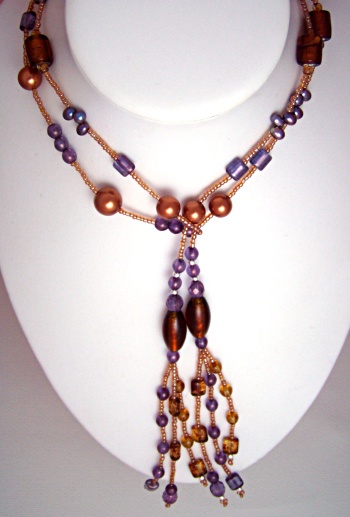
The finished lariat

A lariat is a long open (clasp-less) necklace which can be wrapped several times around one's neck, leaving the ends dangling.
I make lariats between 60" and 95" long.
Materials
- Bead board
- Bead cloth
- Fine Soft Flex (nylon-coated steel strands)
- 2mm x 2mm crimps
- crimp covers
- crimping pliers
- round nose pliers
To get my length of Soft Flex, I wrap it around a 12" ruler five time plus 6 inches. This will be enough for a lariat that will loop once around the neck with the ends hanging loose.
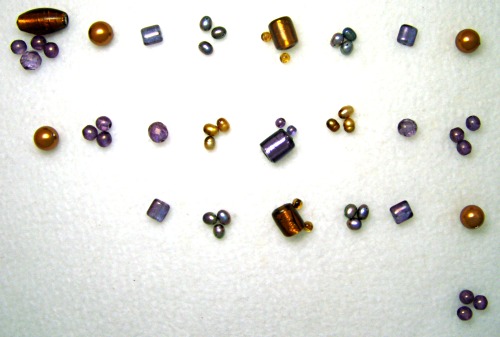
Choose your beads
1) I start by choosing a collection of beads which go together in terms of colour, material and size.
I experiment by putting small piles on my bead board, a roughly-textured plastic chopping board (about £1 from Tesco) which stops the beads rolling around.
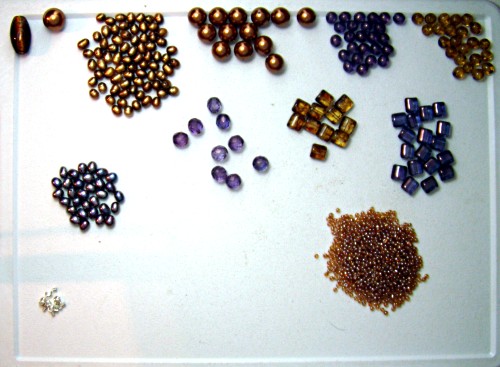
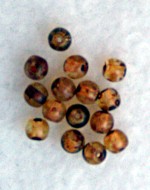
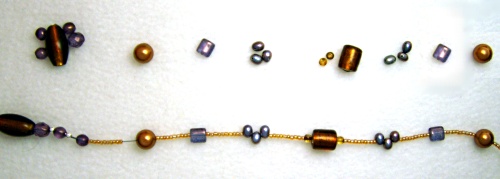
Here, I've chosen bronze silver-lined glass and copper Swarovski crystal pearls (from Creative Beadcraft), a selection of purple, brown and yellow Picassos (from Beadworks) and top-drilled freshwater pearls (from Treasure Island Pearls). The size 11/0 seed beads are a lustered soft brown.
I always put the seed beads on the bottom right as I thread them onto the SoftFlex by poking the thread into the beads.
Preparing the first tassel

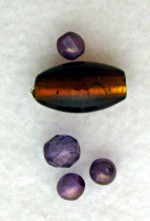
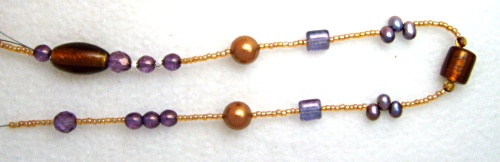
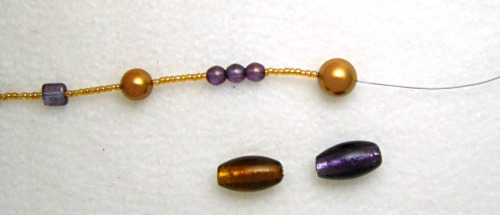
I tend to use a similar combination of beads at the end of lariats: a very large bead, 8mm beads and 6mm beads.
This group balances the design and creates a nice shape.
Once I start the lariat, I already know which beads I will use at the ends.
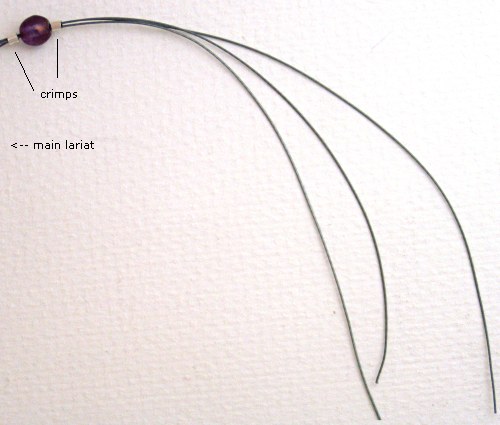
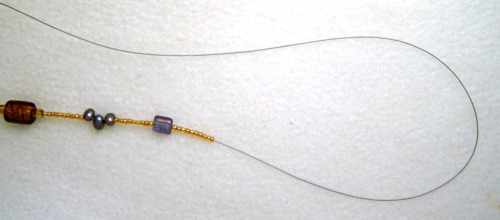
2) Cut a length of Soft Flex for your lariat taking into account the longest tassel. Add 12" to the desired finished length including the longest tassel (72"). Thread one crimp bead, 5" from one end. Do not crimp it yet.
3) Cut two lengths of Soft Flex, each 7" long. Thread them through the crimp with at least 1" of the wire above the crimp. Crimp the crimp.
4) Thread all three wires through one bead and the second crimp. Crimp the second crimp. Except for the seeds beads, your end beads must have holes big enough for three strands of beading wire.
5) As I start to thread, I place a second set of the threaded beads on a bead cloth (plain white material cut to size).
These will be used in the second half of the necklace and also puts beads aside so that there will be enough for the whole necklace, since my designs vary depending on whether beads run out during the making of a necklace.
Make the lariat
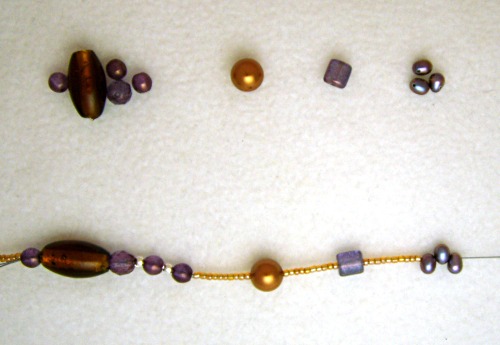
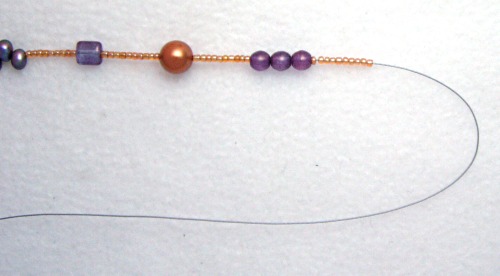
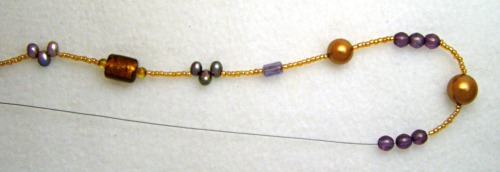
6) Thread beads singly or in small groups. Add ten seed beads between each bead or group. This makes the lariat flexible. You can make a bulkier lariat with five seed beads between or twenty, for a lighter lariat.
7) As I thread beads, I add them to the cloth in sequence (photographed here next to the lariat in progress).
How to design a lariat
I decide what to thread next by varying colour, size and material.
I don't put similar beads next to each other. Mostly, I create short sequences of symmetrical patterns with larger beads at the centre.
I make up these patterns as I go along and might repeat them later on.
For example, a sequence of three might be a:
- 6mm bead
- 10mm bead
- 6mm bead
A sequence of five might be:
- trio of top-drilled pearls
- a 8mm bead
- 4mm bead + 10mm bead + 4mm bead
- a 8mm bead
- trio of top-drilled pearls
A pattern will be a sequence of an odd number of elements, with a central bead.
You can repeat sequences or only use them once in a lariat.
Alternatively, the sequence can be as long as half the lariat, making it symmetrical at the central bead only.
Consider also using a complementary colour scheme (and a change of seed beads) for the middle third of the lariat.
Creating patterns this way means that the lariat is interesting to make but, more importantly, it will look different depending on how it is worn.
Design by trial and error
In making this lariat, some of the things I tried didn't look good and so I redid them until I was happy; I'm including what actually happened when I made this lariat.
8a) After adding a trio of freshwater pearls, I add a pile of 4mm Picasso beads to my bead board to try out a group of yellow beads.
8b) I don't like it and try removing a couple of beads.

8c) I feel that a bigger bead is needed at this point, and add some silver-lined bronze tubes to my bead board.
8d) The holes of the tube beads are quite large and so I flank them with the 4mm Picassos so that the seed beads don't go into the tube's holes.
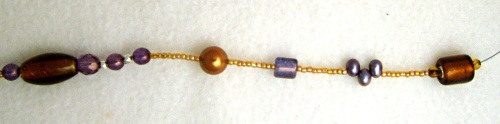
9) I decide that the tube bead group will be the centre of a sequence and reverse the pattern. As I thread more beads, I add a second set of beads to my cloth.
10) I fold the lariat in half with the tube bead in the centre to check that the pattern is repeated. I use three 6mm rounds to duplicate the trio of beads at the end of the lariat.
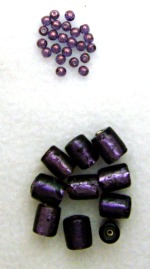
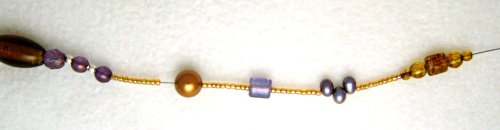
11) As I continue threading, a set of purple silver-lined tubes and 4mm purple Picassos are a natural complement to the bronze beads used earlier.
I add the new beads to my bead board.
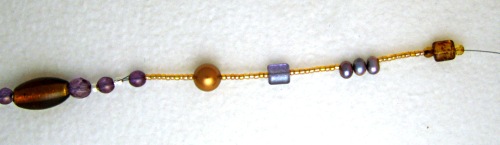
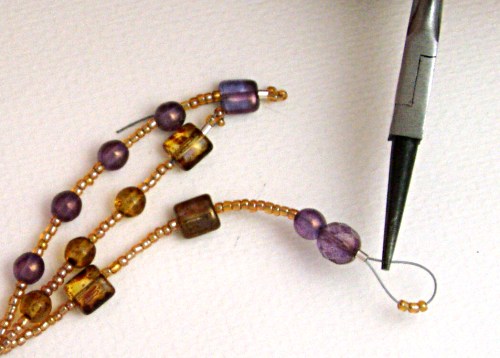
12) Occasionally folding the lariat helps reveal the repeating and complementary patterns.
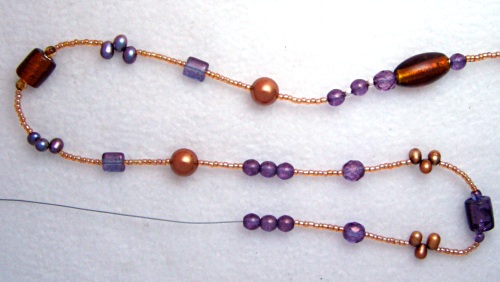
How the lariat looks a little later, laid out to reveal the symmetrical and repeating patterns.
13) While threading, I occasionally hold the lariat up and divide the thread in half to see how close I am to the centre.
14) More beads and the centre is close now; I have to decide what the central bead will be. It will sit in front of the loop on the neck when worn.
15) I decide on a 12mm Swarovski crystal pearl. I also considered large silver-lined ovals which I used at the ends.
This is what my bead cloth looks like now. It has all the beads up to the centre bead in order.
16) Completing the necklace is now a case of threading beads picked up from the cloth in reverse order.
Finish the lariat by adding the tassels
Because I don't know what beads I'll end up using in a lariat until I've made it, I make the tassels at the very end, only using beads that I used in the lariat.
17) When you've reached the other end of your lariat, thread the end beads, including the two crimps with a bead in between to match the other end. Do not crimp yet.
18) Thread two 7" lengths of Soft Flex through the beads, through the crimps, and through the bead before the top crimp. Crimp both crimps.
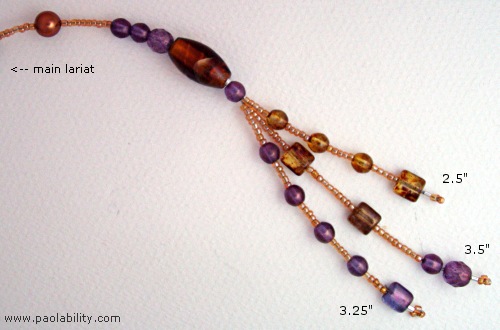
19) Thread the first part of the tassel. I usually start with the shortest wire of all six tassels. The tassel should end with a bead with a hole large enough for the wire to go through twice, a crimp and three seed beads.
20) Thread back through the crimp and the bead next to it. If you can thread back further, do so; the longer the better.
21) Tighten the wire: push the crimp towards the big bead, pull on the end. Repeat as necessary (usually about 3 times). Crimp the crimp.
22) Cut off the excess wire.
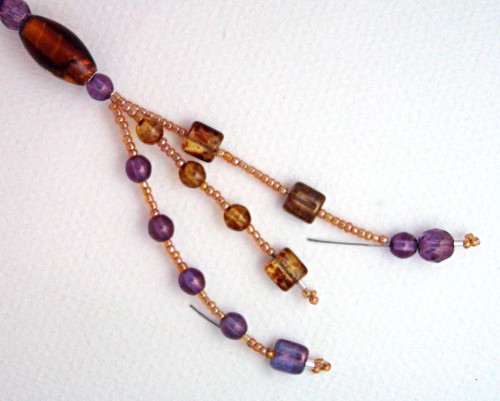
23) Repeat steps 7-10 for the remaining tassel strands.
When starting the other strands, vary the number of seed beads at the top so that the first main beads are staggered. In this example, I start with 5, 8 and 10 seed beads.
To thread back through the beads, I grip near the end of the wire with enough excess to more than go through the first bead. As the wire emerges, I use my pliers to grip it and pull it through.
24) Make the tassels at the other end. Trim off any excess wire. They don't have to match 100% in design but they should end up the same lengths and use the same beads.
The finished tassel
The finished lariat
Wearing options
See how to start and end a lariat without tassels.